Water Bottle Visualizer
In the section on variables we saw how to calculate the volume of water in a bottle. For this program, let’s see how we could use SplashKit to draw this to the screen. This will help you practice how to think through algorithms to draw shapes.
The Algorithm
Drawing something to the screen needs us to think through the algorithm. In the multimedia primer there is a list of different methods that we can call to perform the drawing for us, so we just need to work out what values we need to provide these methods.
We can start by planning out the algorithm at a high level, and then work out the details. The plan we came up within involves the following steps:
- Set up the coordinates for the water bottle.
- Show a welcome message.
- Read in how full the water bottle is as a percentage.
- Calculate the height of the water.
- Open the Window.
- Draw the bottle.
- Wait so that the user can see this.
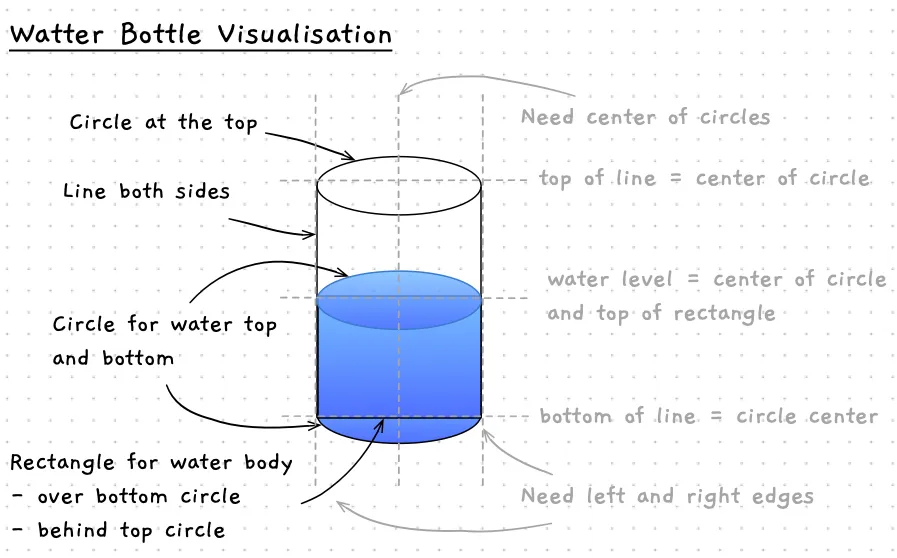
Setting up the coordinates will require us to think through the values that we need to position the shapes on the screen. Pencil and paper are great here. Draw out what you want the scene to look like, and then note the coordinates that you will need to get the computer to create this. We have sketched out a plan for the water bottle below.

Showing a welcome message and reading in values from the user will involve the same steps we have seen in our other programs.
Once we have a percentage value from the user, we can convert it to a value between 0 and 1, then multiply this by the bottle’s height to work out the height of the water.
If the user enters the percent fill as an integer, then we can divide the value they entered by 100 to achieve this.
For example, 15% full would be stored as 15 / 100 = 0.15, and a bottle height of 100 pixels would then result in a water height of 0.15 * 100 = 15 pixels.
Opening the window is a call to the OpenWindow method in SplashKit, so it is straight forward. We just need to think about the title we want, and how large it will be.
The main logic will come in the drawing of the water bottle. Drawing up a visual plan should help you with this. You need to think through the steps the computer will need to draw individual shapes to form a larger picture. Here are a few notes:
- We can fill to show the water, but can draw over the top to get an outline. So we will use both
FillCircleandDrawCircle, as well asDrawLineandFillRectangle. - We need to draw the rectangle over the bottom circle. Then it will draw over the part of the circle that should be behind the water.
- The order of drawing will need to be:
- Circle for the top of the water
- Bottom of the bottle - water and outline
- Water - rectangle to water height
- Side lines and top of bottle - outline
This gives us something like the following for the pseudocode for the program:
Screen size: - Window width = 600 - Window height = 600Determine bottle dimensions - radius of the circles = 80 - height of the bottle = 400 - diameter of the bottle = twice the radius - center x of the bottle = half window width - left x of the bottle = centre x - the radius - right x of the bottle = centre x + the radius - base of the bottle = Window height - radius - 5; - top of the bottle = bottle base - bottle height (remember top is at 0)
Show the program details
Get the percent fillCalculate the height of the water = bottle height * percent full / 100
Calculate the y value for the top of the water. water Y = bottle base - water height
Open the window, "Water Bottle Visualiser!", 600 wide, 600 highClear the screen white
Fill the Circle at the top of the water - using the center of the bottle, the water Y, and bottle radius
Fill and Draw the Circle at the bottom of the bottle - using the center of the bottle, the base of the bottle, and the bottle radius
Draw the body of the water as a rectangle - this will use the left x of the bottle, the water y, bottle diameter, and water height
Draw the outline of the bottle  Draw the two lines, one on the left one on the right  Draw the circle at the bottom
Refresh the screen to show the user
Delay for 5 seconds, so the user can see it
We can play around with different values for the bottle size and window dimensions. By using constants for these values we can just change the value where the constant is declared.
The Building Blocks
As you can see from above, we will need a whole range of constants and variables for our program. We can use constants to set up the dimensions of the bottle, and a variable to store the user’s input for what percentFull the bottle should be.
For the bottle drawing we will need to capture the following. These can be constants as we won’t change these as the program runs.
BOTTLE_RADIUSfor the size of the circle. We can use this to draw circles at the top and bottom of the bottle, and at the top of the water.BOTTLE_HEIGHTthe height of the water bottle cylinder.BOTTLE_DIAMETERto store the full width of the circle. Can be calculated fromBOTTLE_RADIUS. We need this to draw the water. This will be a rectangle drawn on top of the middle of the circle.BOTTLE_CENTER_Xfor the position of the bottle. This is the distance from the left of the screen. We can calculate this from the width of the window to position the bottle in the middle of the screen.BOTTLE_LEFT_XandBOTTLE_RIGHT_Xto store the left and right sides of the bottle. We can use this for the position of the rectangle, and the lines for the side of the bottle. They can be calculated from the bottle’s radius and center x.BOTTLE_BASE_YandBOTTLE_TOP_Yto store the distance from the top of the screen to the top and bottom of the bottle. This will tell us where to draw the circles, lines, and rectangles. The base can be calculated from the height of the window, and the top can be calculated from the base and the bottle’s height.
For the water height, we need a few variables as this can change.
percentFullwill capture how full the bottle is. This can be an integer. We can then divide this by 100 to get the proportion to apply to the bottle’s height to calculate the water height.- When we know the
percentFull, we can calculate thewaterHeight. - We need to know where the water should be drawn. When we know its height, we can use that to calculate a
waterYvalue. This will represent where the water is up to within the bottle.
As with the previous program, we also need a string (we called it line) to store the text data from the user before we convert it to a number for us to use.
To help communicate how this works, we can capture this in a comment in the code using ASCII art to output the bottle’s shape and indicate what the different constants and variables represent. See the following comment as an example. Read through the pseudocode and match up the comment with the constants, and their calculations. Notice how easy it will be to resize the bottle - you can change the radius or height and the other values will all be updated to reflect this!
/*--------------------------------------| Water bottle shape...|| BOTTLE_LEFT_X BOTTLE_RIGHT_X| | || v v| ___________| / \| ^ | x | <-- x = BOTTLE_CENTER_X| | |\___________/| + BOTTLE_TOP_Y| | | || | | ___________ || | |/ \|| | | | <-- waterY| | |\___________/| ^| | | ___________ | | waterHeight| | |/ \| v| v | | <-- BOTTLE_BASE_Y| \___________/| BOTTLE_HEIGHT| <-----x-----> BOTTLE_RADIUS| BOTTLE_DIAMETER--------------------------------------*/These constants will also help when we write the drawing code. The names of the constants will help make it clear what is being drawn. Imagine if these were all just literal values — the code would be a jumble of numbers! Creating constants helps make it clearer what you are doing in the code.
Have a go at coding this plan up yourself! Here are the steps that we suggest following:
- Show the welcome message, show the window, and delay. This gets these steps out of the way.
- Draw the outline of the bottle — draw the circle at the bottom and top, and the lines. Make sure it looks right before you move on.
- Play around with sizes and positions until you are happy.
- Add the water with a fixed percent full.
- Add the code to read the percent full from the user.
- Test — empty, full, midway, etc.
- Test more — what about crazy values? What happens? (we can fix these later)
- Celebrate.
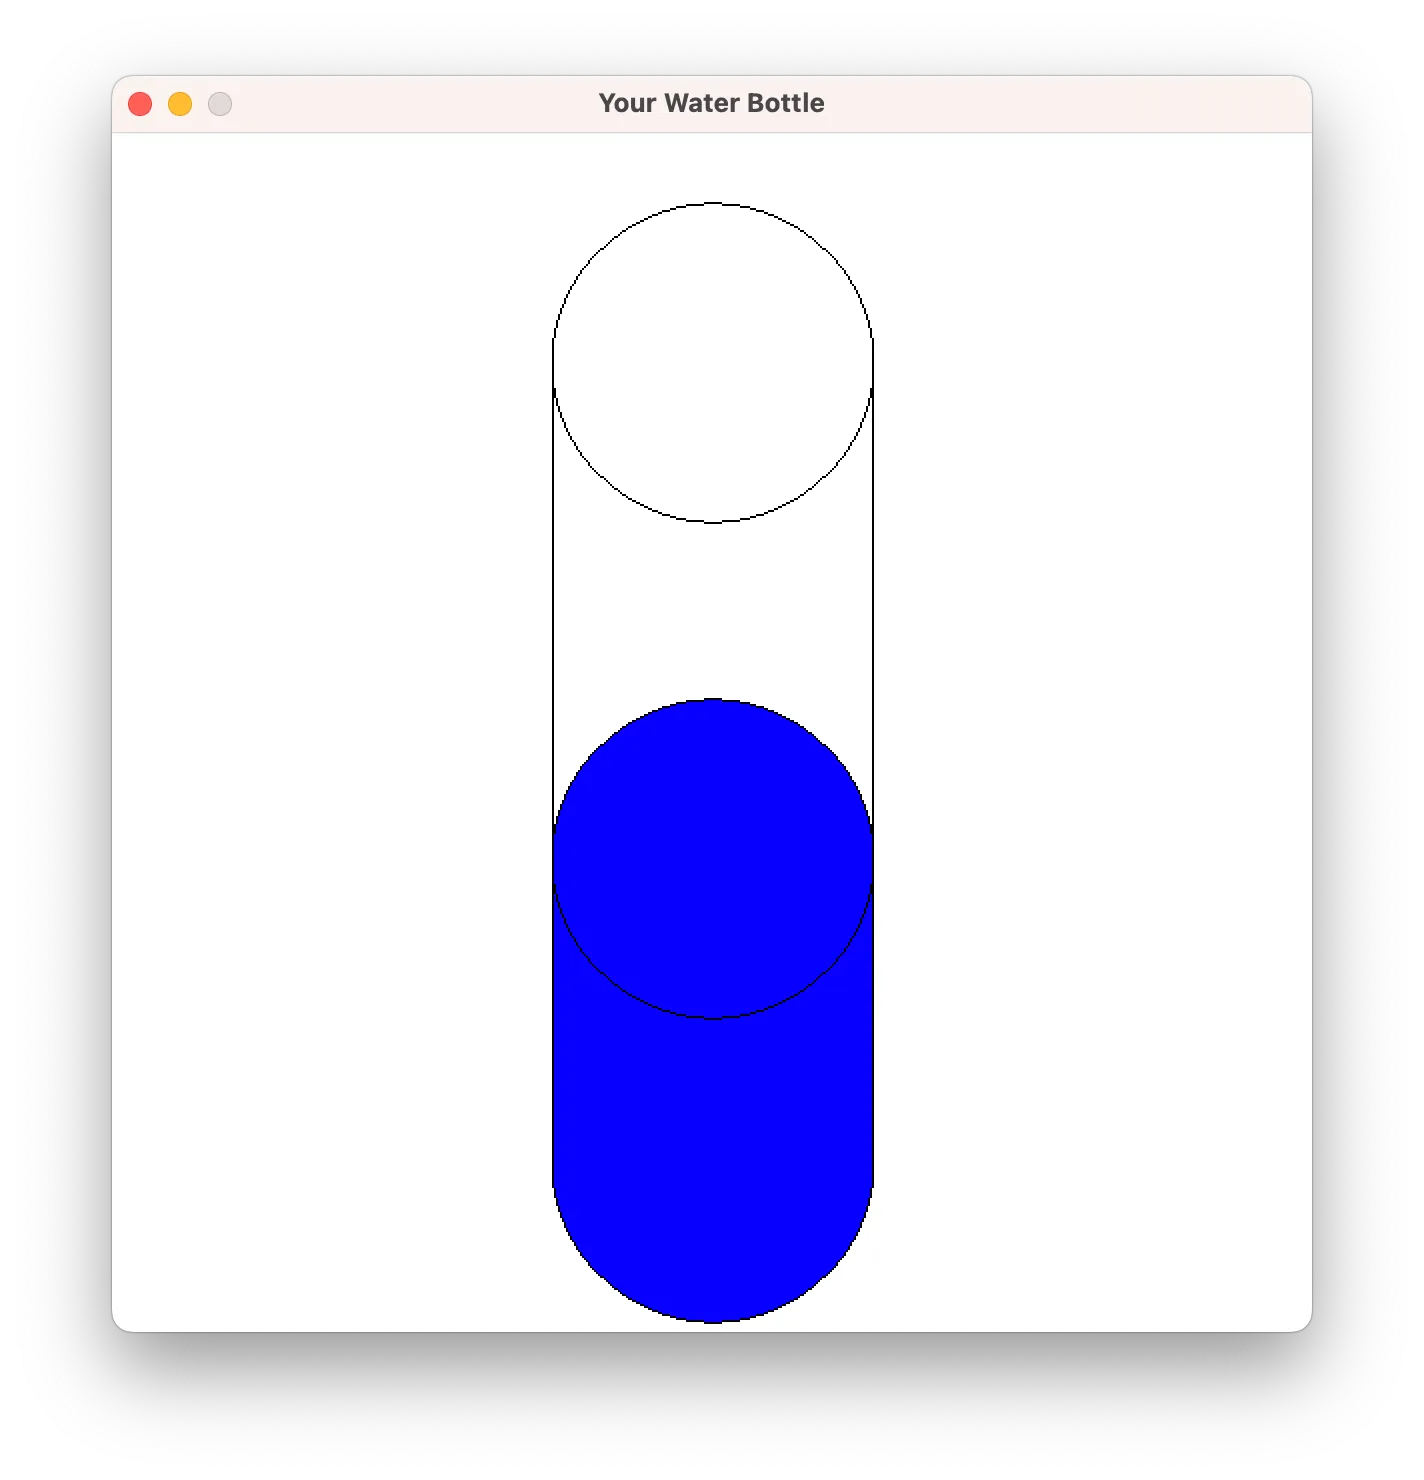
Here’s a screenshot of our implementation running to show you what you’re aiming for:

Remember you can have a look at our version of the code if you get stuck with any of these steps. The code is in the campsite reflections section.