Set up my Raspberry Pi
This guide will go through how to set up the software on your Raspberry Pi, including how to:
- Download and burn Raspberry Pi OS to an SD card.
- Install Raspberry Pi Operating System (OS).
- Install programs and tools used in the next chapters (continued on next page).
1. Download Raspberry Pi OS
Follow the steps below to download the recommended Raspberry Pi OS:
-
Download and install the Raspberry Pi Imager from raspberrypi.org
- Select the version for your operating system.
- Run the installer and follow the instructions.
-
Insert the micro SD card into your computer.
- You may need a Micro SD card adapter and/or a USB SD card reader.
- We recommend using a micro SD card with a size of at least 16 GB (32 GB preferred).
-
Open the Raspberry Pi Imager.
-
Click CHOOSE OS.
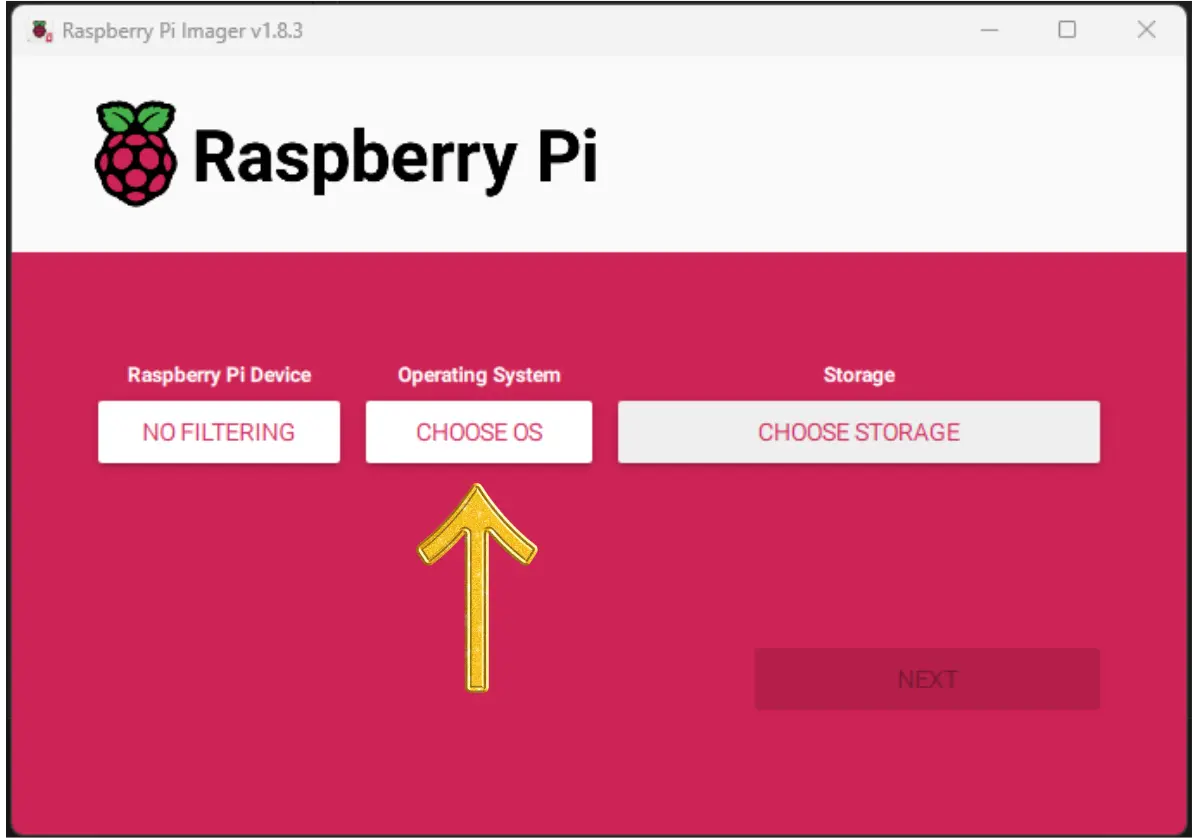 Image not subject to The Programmer's Field Guide CC BY-NC-ND 4.0 License
 -
Select Raspberry Pi OS (64b-bit)
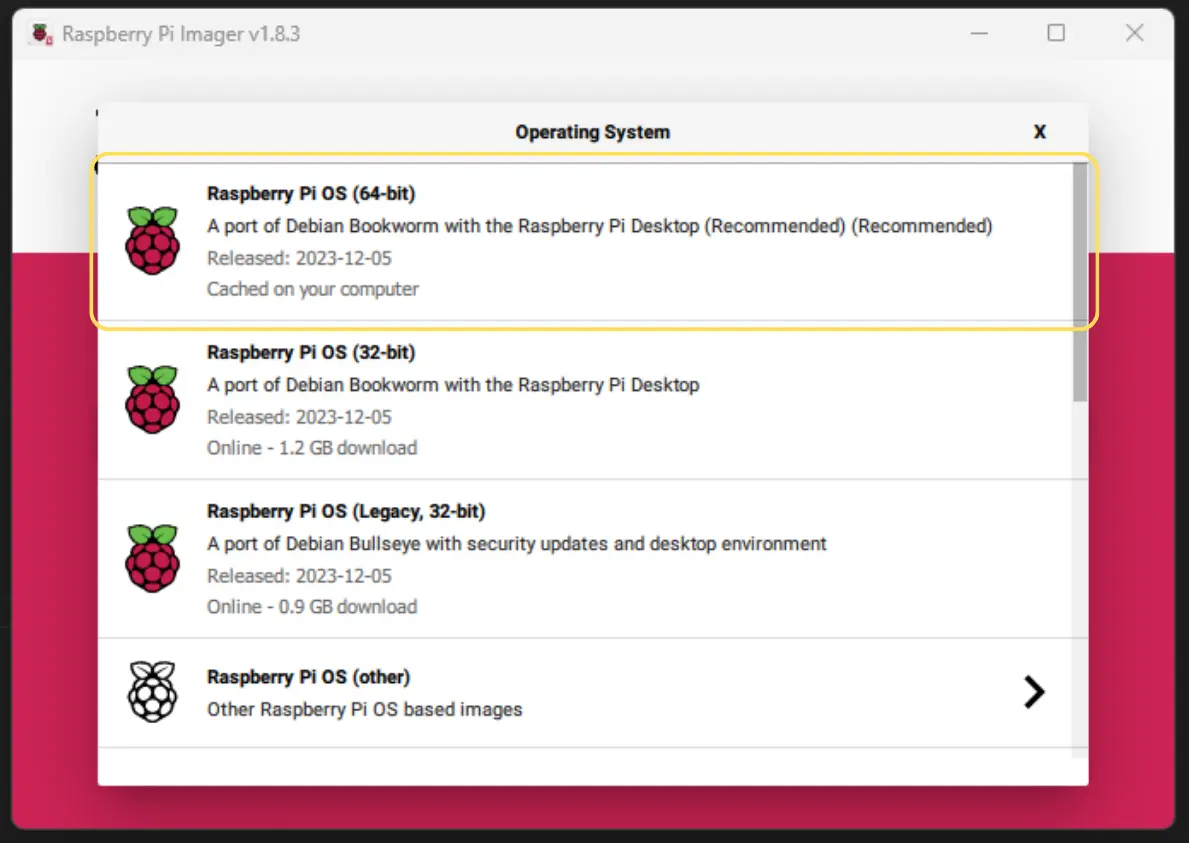 Image not subject to The Programmer's Field Guide CC BY-NC-ND 4.0 License
 -
Click storage and select the micro SD card and click next.
-
Click
Noto the question “Would you like to apply OS customisation setting?- Optionally you can click edit settings to preconfigure options like the hostname, password, and Wi-Fi settings. Click yes if you want to do this.
-
Click
Yesto the question Are you sure you want to continue?- WARNING: This will erase all data on the selected storage device.
-
Wait until the Raspberry Pi Imager has downloaded, written and verified the image on micro SD card. (This may take a while)
-
Click continue and remove the micro SD card from your computer.
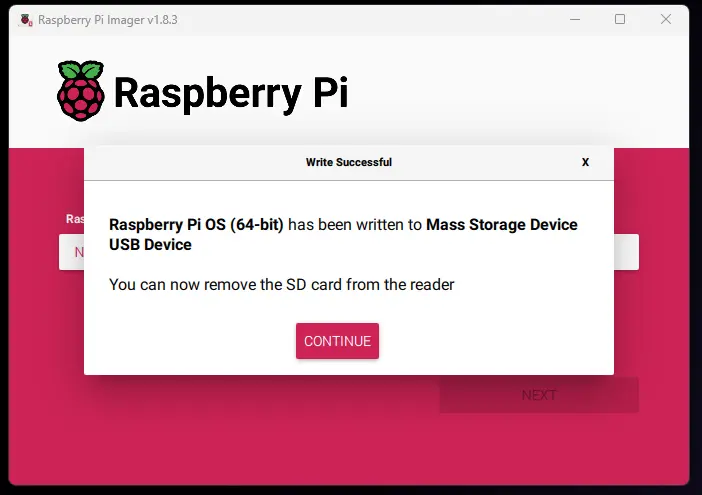 Image not subject to The Programmer's Field Guide CC BY-NC-ND 4.0 License
2. Install Raspberry Pi OS
Follow the steps below to install the Raspberry Pi OS on the micro SD card:
-
Insert the micro SD card into the Raspberry Pi and power on. (See Build my Raspberry Pi for setup instructions)
-
On the Welcome screen click next.
-
Set your country, language and time zone and click next.
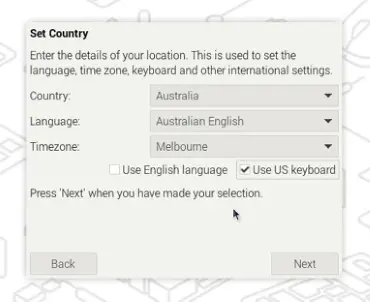 Image not subject to The Programmer's Field Guide CC BY-NC-ND 4.0 License
 -
Set your username and password, click next.
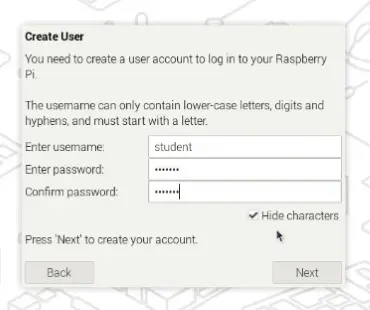 Image not subject to The Programmer's Field Guide CC BY-NC-ND 4.0 License
 -
**Optional**
Select Wi-Fi network and enter password, click next.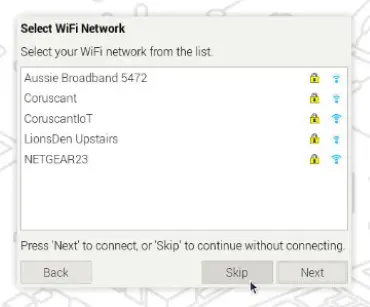 Image not subject to The Programmer's Field Guide CC BY-NC-ND 4.0 License
 -
Select your preferred browser: Chromium or Firefox, Click next.
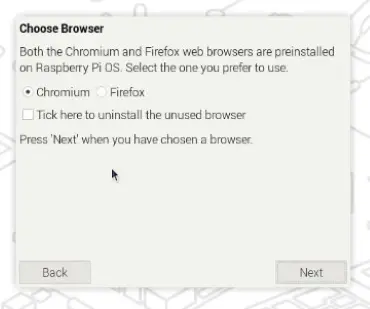 Image not subject to The Programmer's Field Guide CC BY-NC-ND 4.0 License
 -
**Optional**
Update Software, Click next.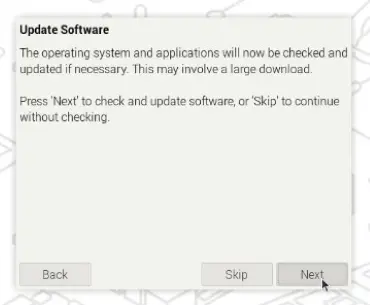 Image not subject to The Programmer's Field Guide CC BY-NC-ND 4.0 License
 -
Click restart.
-
After the reboot you will be presented with the Raspberry Pi Desktop:
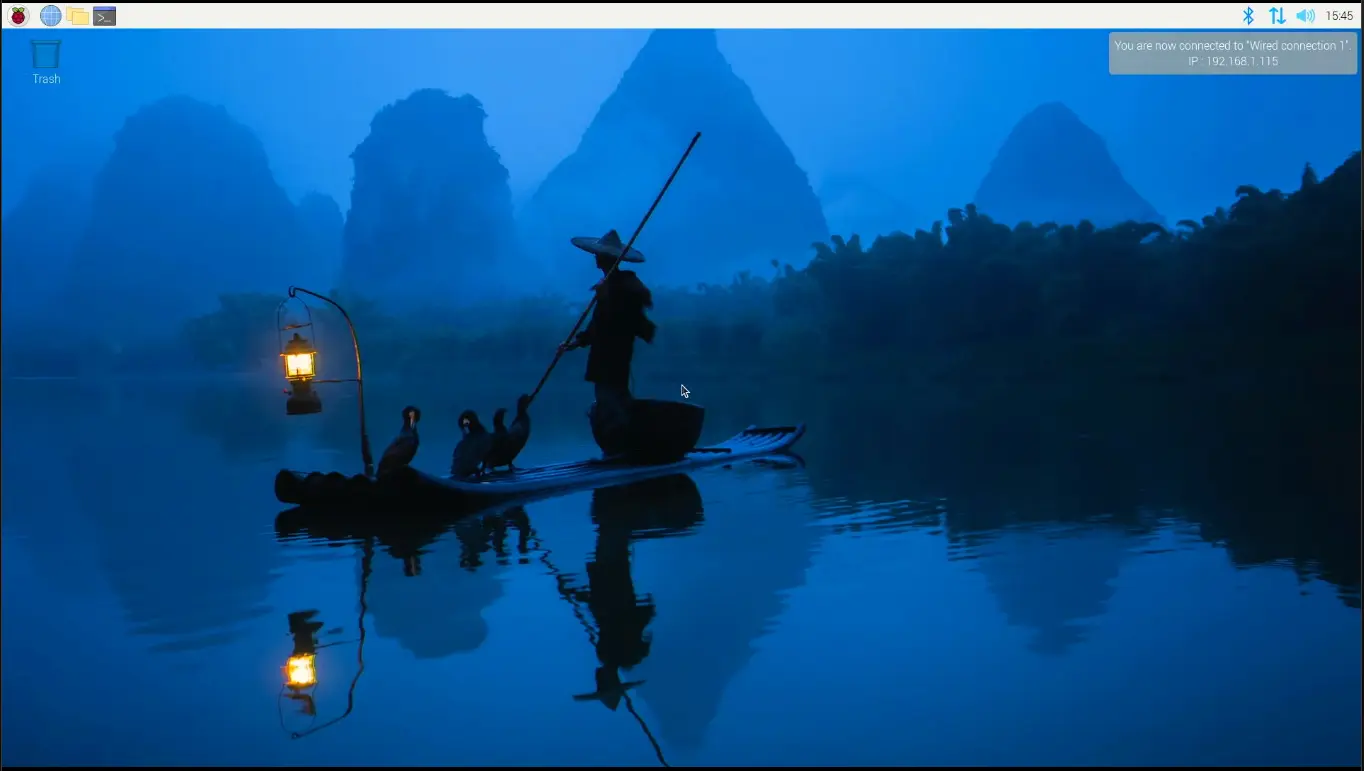 Image not subject to The Programmer's Field Guide CC BY-NC-ND 4.0 License
 -
Raspberry Pi OS Install Complete!
3. Setup Raspberry Pi OS
Let’s get your Raspberry Pi ready to start coding.
This section will go through all the steps to install the required Applications and Tools that you will need to code in C# and C++ with SplashKit. To make things easier we have an automated script for fresh installs that will install all the required tools and applications for you or you can follow the manual steps below.
Automated Setup
This script will install the following applications and tools:
- Visual Studio Code
- C/C++ Extension
- C# Extension
- .NET SDK
- SplashKit
- SplashKit Global
- wget
- git
- curl
- clang
Open the Terminal and run the following command:
curl -s "https://programmers.guide/resources/Raspberry_Pi_InstallScript.sh" | bash /dev/stdinOnce the automated script has finished running, close and reopen the Terminal.
Run the command skm to check SplashKit is installed correctly.
Manual Setup Steps
If you choose not to use the automated set up above, or are experiencing issues with this, you can follow these steps below:
1. Install the SplashKit SDK
SplashKit is a beginner’s all-purpose software toolkit that will allow you to create fun and exciting programs more easily, especially for Graphical User Interface (GUI) programs.
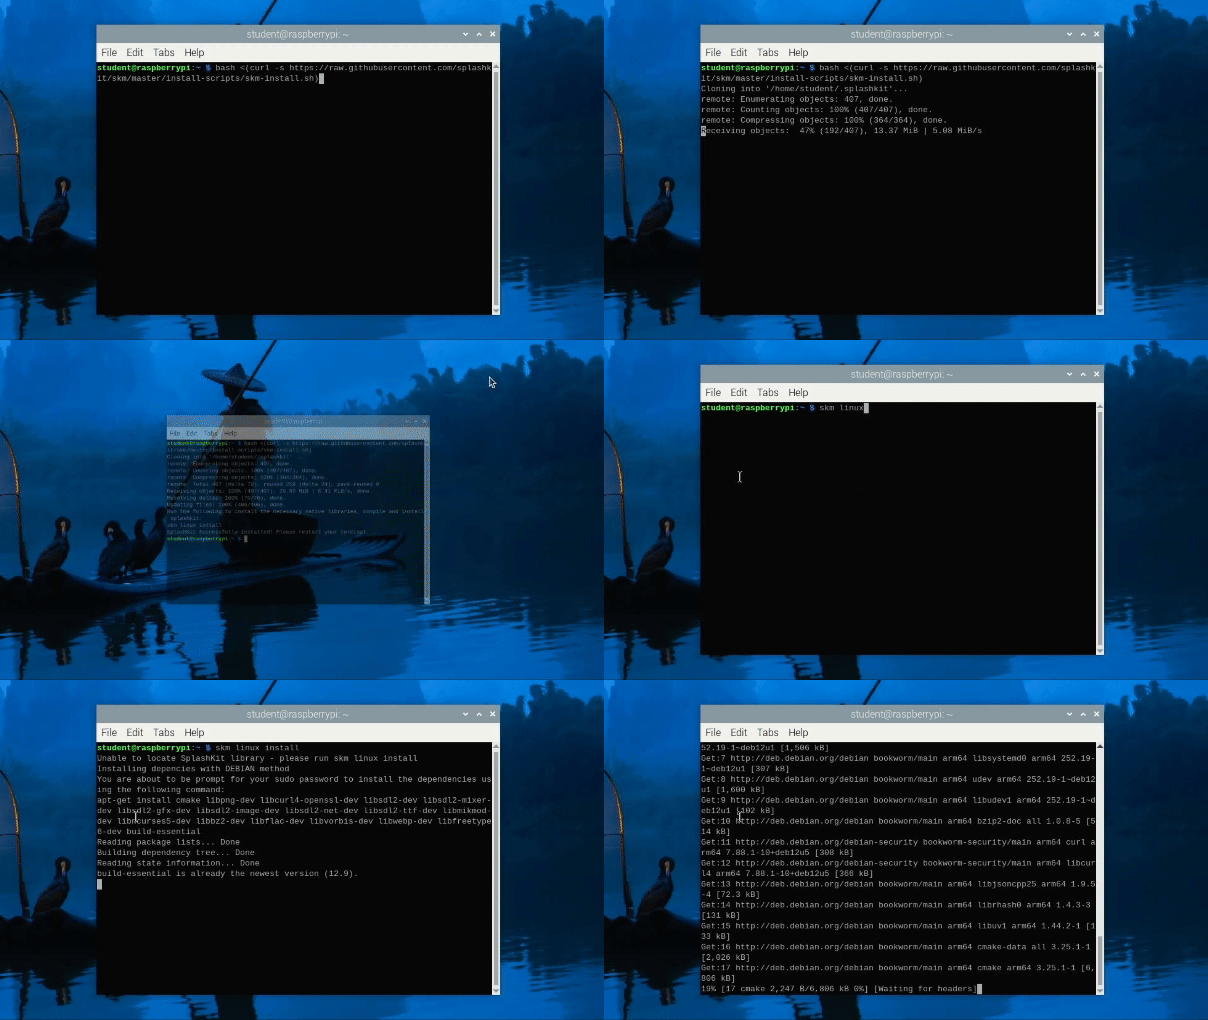
Copy and paste the following command into your Terminal window to download and run the SplashKit installer:
bash <(curl -s https://raw.githubusercontent.com/splashkit/skm/master/install-scripts/skm-install.sh)Close and reopen the Terminal, then run the command below to build SplashKit on the Pi:
skm linux installWhen prompted, type y and press enter to confirm the installation.
2. Install SplashKit Globally
Finally, you will need to install the SplashKit Global Libraries. This will install the SplashKit libraries and library include files into the system default global locations so that when building (compiling) programs created with SplashKit, the compiler can find these files automatically.
To install SplashKit globally on your machine:
Copy and paste the following command into your Terminal window:
skm global install3. Install Visual Studio Code
Visual Studio Code, also commonly known as VS Code or just Code, is a powerful and versatile code editor that enables efficient coding, debugging, and collaboration for your SplashKit projects!
Run the following command in the Terminal to install Visual Studio Code:
sudo apt install code
Recommended Extensions
The final step to complete the setup of VS Code is to install a few Extensions in VS Code:
Go to the page linked above, follow the steps to install both the C# and C/C++ recommended extensions, and then come back here and continue to the next step. You can use the “Back button” in your browser to return to this page.
4. Install Language Specific Tools
Some coding languages require specific tools/frameworks to be installed to be able to build and run your code files.
As you will be coding in C# and C++ in this book, let’s look at the tools needed for these languages:
C# Tools
For coding in C#, you will need to install the .NET framework, also commonly called dotnet.
You will use this to create, build, and run your C# project code.
Download the latest version of the .NET SDK using the following command:
curl -sSL https://dot.net/v1/dotnet-install.sh | bash /dev/stdinYou will also need to add the .dotnet folder to your PATH environment variable with the following commands:
echo 'export DOTNET_ROOT=$HOME/.dotnet' >> ~/.bashrcecho 'export PATH=$PATH:$HOME/.dotnet' >> ~/.bashrcsource ~/.bashrcTest dotnet is installed correctly by running dotnet --version in the Terminal.
For more details on the process, refer to this article Deploy .NET apps on ARM single-board computers
C++ Tools
For coding in C++, you will need to have a C++ compiler installed to build your C++ code into a file you can use to run your program.
Commonly used compilers are g++ and clang++.
g++ is installed by default on the Raspberry Pi.
To install clang++ run the following command:
sudo apt install clang -y5. Optional Steps
Setup zhs shell
When using the terminal you are actually interacting with a shell, where the default for the Raspberry Pi is bash, but there are other shells available.
Here we will install zsh and oh-my-zsh to customise the terminal. These will give you a more user-friendly terminal experience with themes and plugin support.
To install zsh, run the following command in your Terminal:
sudo apt install zsh -yTo install oh-my-zsh, run the following command in your Terminal:
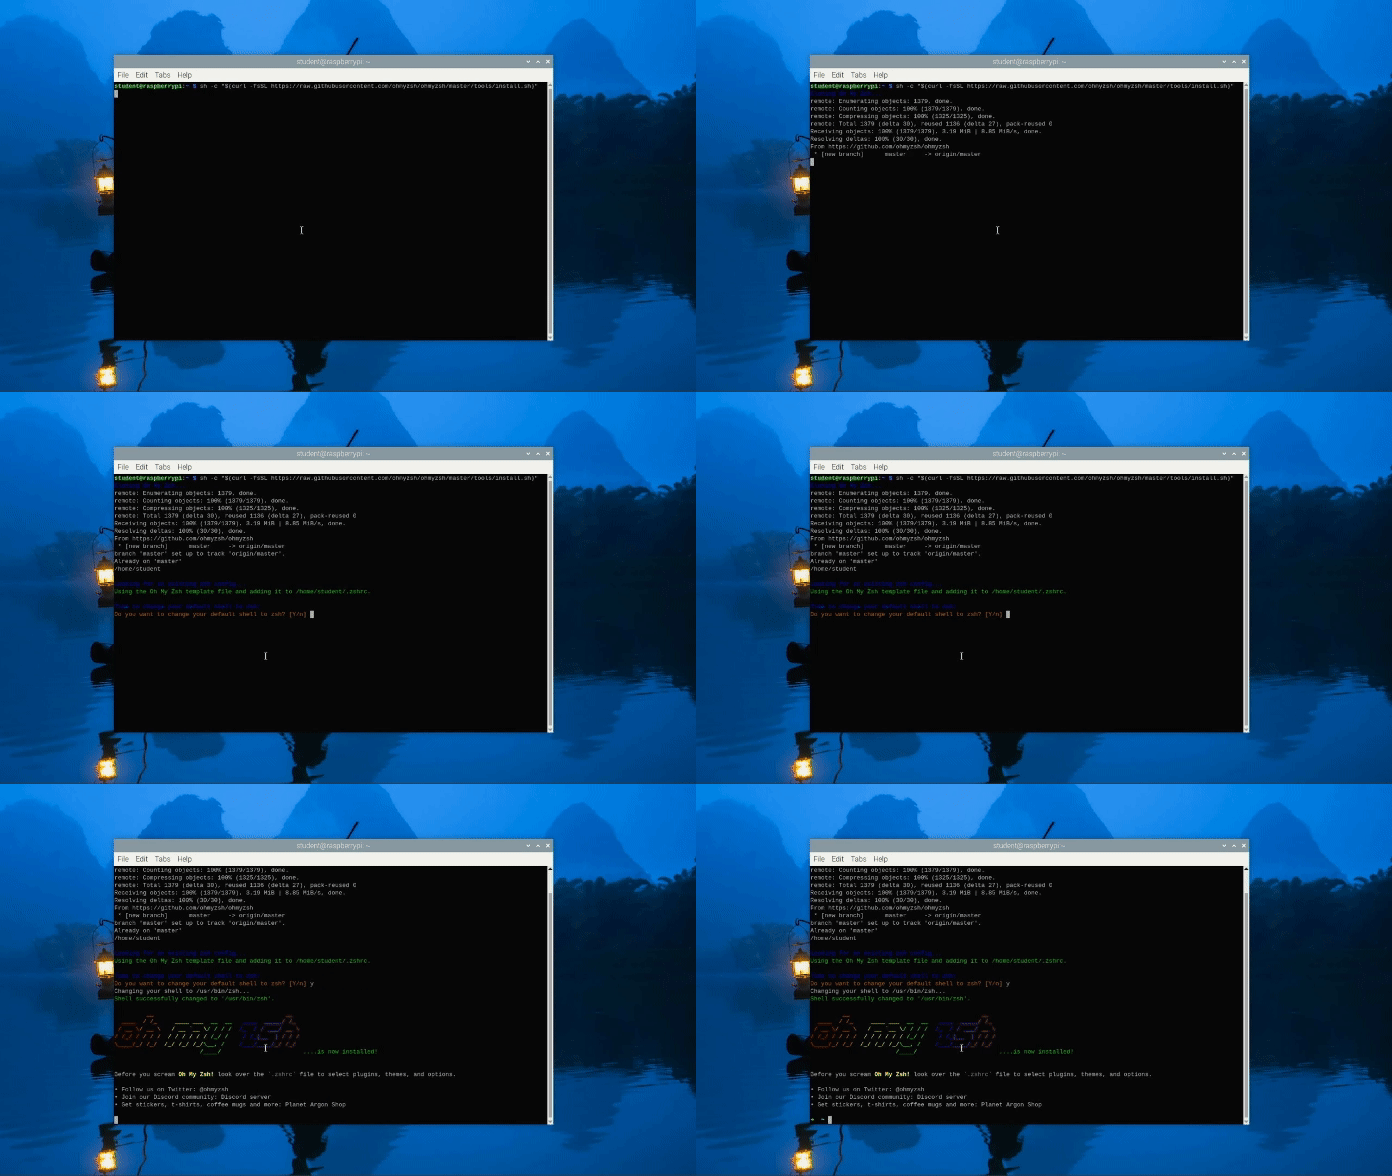
sh -c "$(curl -fsSL https://raw.githubusercontent.com/ohmyzsh/ohmyzsh/master/tools/install.sh)"Answer y to the question Do you want to change your default shell to zsh?
Add SplashKit and dotnet to the PATHs to zsh:
echo "export PATH=$PATH:$HOME/.dotnet" >> ~/.zshrcecho "export DOTNET_ROOT=$HOME/.dotnet" >> ~/.zshrcecho "export PATH=$PATH:$HOME/.splashkit" >> ~/.zshrcsource ~/.zshrcPlugins
There are a number of plugins available for oh-my-zsh that add additional functionality to the terminal.
This article has a list of pre-installed plugins, although there are others available as well.
To install a plugin you need to add it to the plugins list in the ~/.zshrc file.
Using autojump as an example:
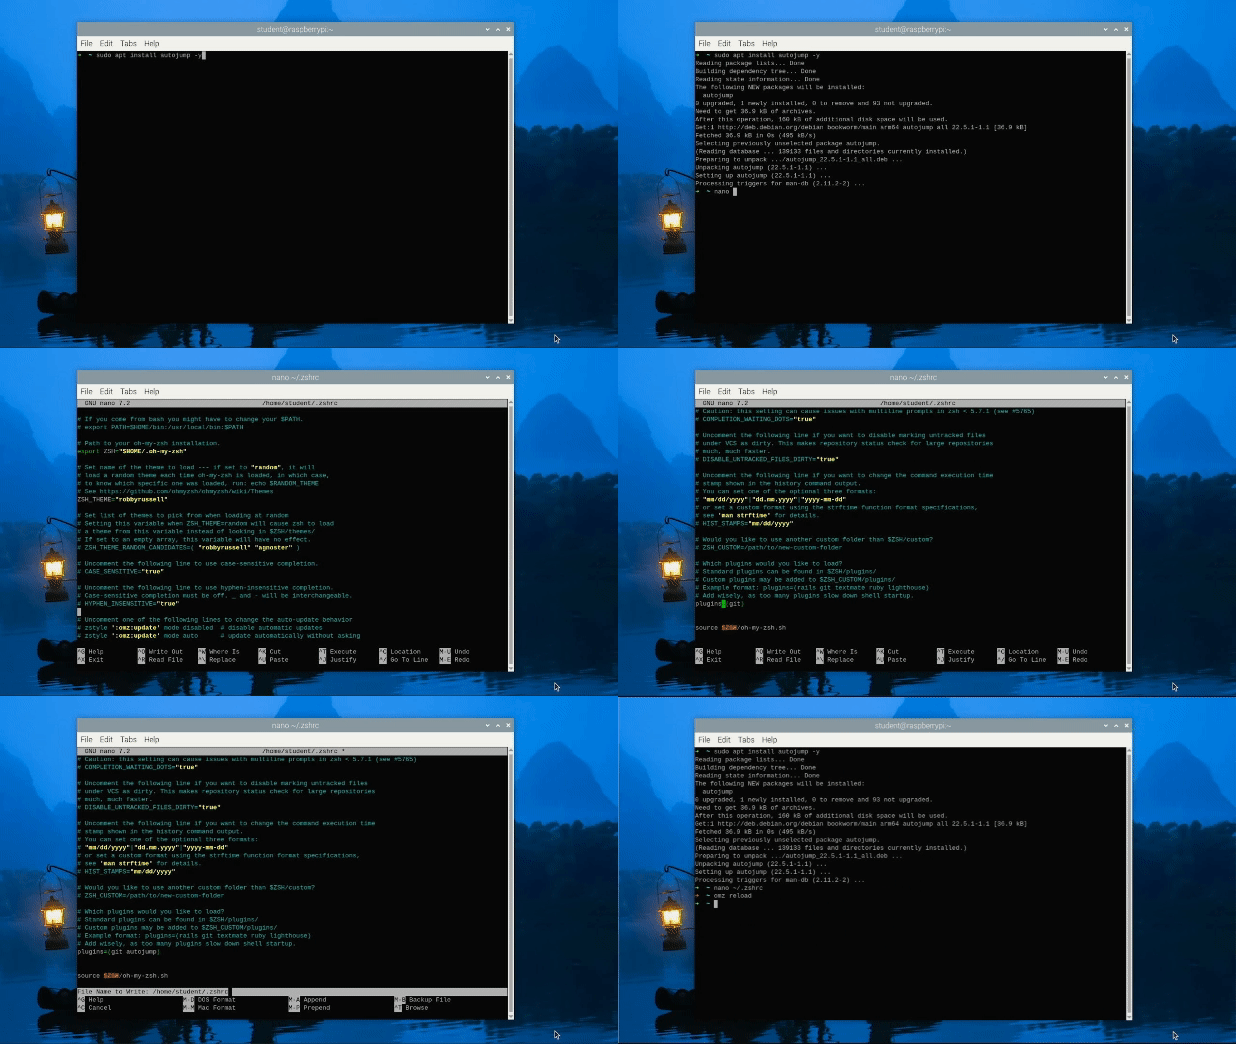
First you will install it with:
sudo apt install autojump -yThen add it to the plugins list in ~/.zshrc
nano ~/.zshrcNavigate to the plugins line and add autojump to the list. git will be listed already.
Use a space to separate the plugins as shown below:
plugins=(git autojump)Save and close the file. Then run the following command to update the terminal:
source ~/.zshrcAdd Shortcut for the Programmers Field Guide
To add the Programmers Field Guide to the menu, run the following commands in the terminal. On the Raspberry Pi it will appear under “Programming” in the menu.
    echo "Adding Programers Feild guide to Menu"    sudo curl -s "https://raw.githubusercontent.com/splashkit/the-programmers-field-guide/main/public/favicon.svg" -o /usr/share/pixmaps/feildguide.svg
    touch ~/programmers-field-guide.desktop    echo "[Desktop Entry]" >> ~/programmers-field-guide.desktop    echo "Type=Application" >> ~/programmers-field-guide.desktop    echo "Name=Programmers Field Guide" >> ~/programmers-field-guide.desktop    echo "TryExec=/usr/bin/x-www-browser" >> ~/programmers-field-guide.desktop    echo "Exec=/usr/bin/x-www-browser https://programmers.guide/" >> ~/programmers-field-guide.desktop    echo "Icon=/usr/share/pixmaps/feildguide.svg" >> ~/programmers-field-guide.desktop    echo "Categories=Development;" >> ~/programmers-field-guide.desktop    sudo mv ~/programmers-field-guide.desktop /usr/share/applications/programmers-field-guide.desktop
Desktop Background
To customise the desktop background, right-click anywhere on the desktop and select Change Background (Properties on the Raspberry Pi).
Then, select the image or theme you want to use as your background.
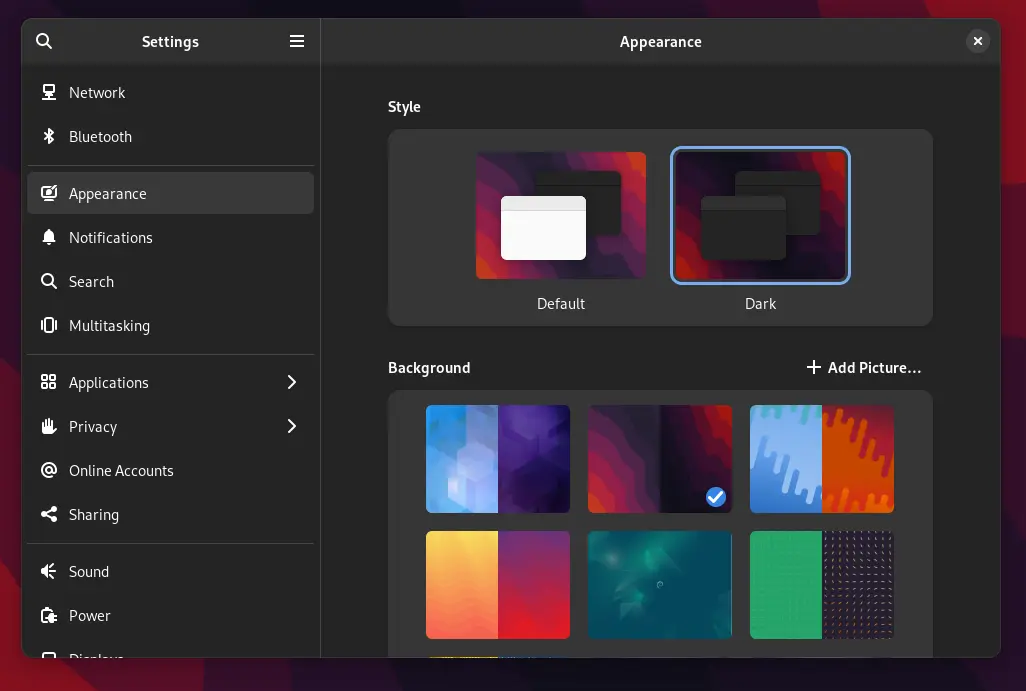
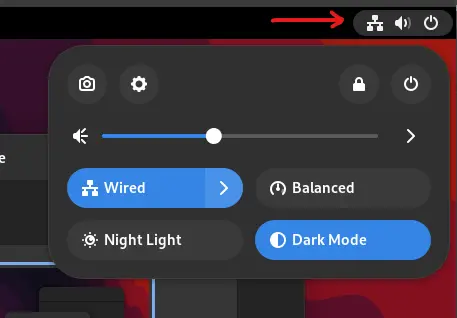
You can toggle dark mode by clicking on the icon in the top right of the screen and selecting the mode you want to use.
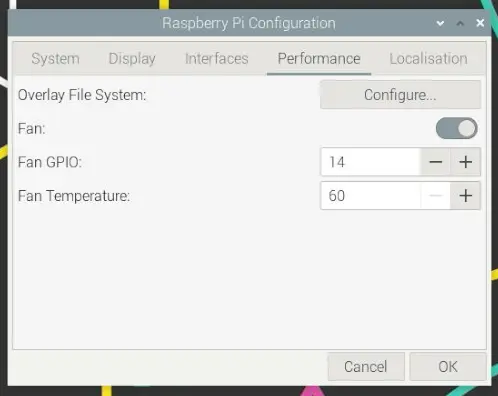
Raspberry Pi Set Fan Control
If you are using a fan on your Raspberry Pi with GPIO control, you can configure it to turn on when the CPU reaches a specific temperature.
Click the menu, select Preferences, then Raspberry Pi Configuration, and select the Performance tab.
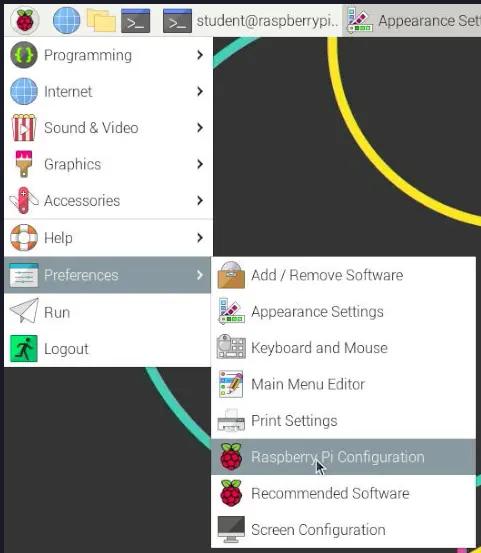
Toggle the fan on, select the GPIO pin you are using, and set the temperature the fan will turn on when reached. If you follow our Pi setup guide, you will use GPIO 14, and we recommend setting the fan to turn on at 60 degrees.
