Case Statement
The case statement is the second kind of branching statement. It allows you to create paths that execute code based to value of an expression. This allows one case statement to handle many alternative paths.

Case Statement — when, why, and how
The case statement is a more specialised way of branching in code, so it tends to be used less frequently than the if statement. To use a case statement you need to have a single expression. Each branch of the case statement has a value it tests the expression against, and only executes if the two values match.
Looking back at the example we gave for using multiple if statements, we could convert this code to a single case statement. Each branch would test if the language entered by the user matched a fixed value. When the language is “C#”, our case statement would run one block; when it is “C” or “C++” our case statement would run another block. There are no limits to the number of cases a single case statement can have, as long as every branch has a unique value to test for.
In C#
The syntax for the case statement in C# uses the keyword switch followed by the expression to test.
Within the curly braces you then have a list of cases.
Each case has a value to match followed by a colon (:) and a list of statements.
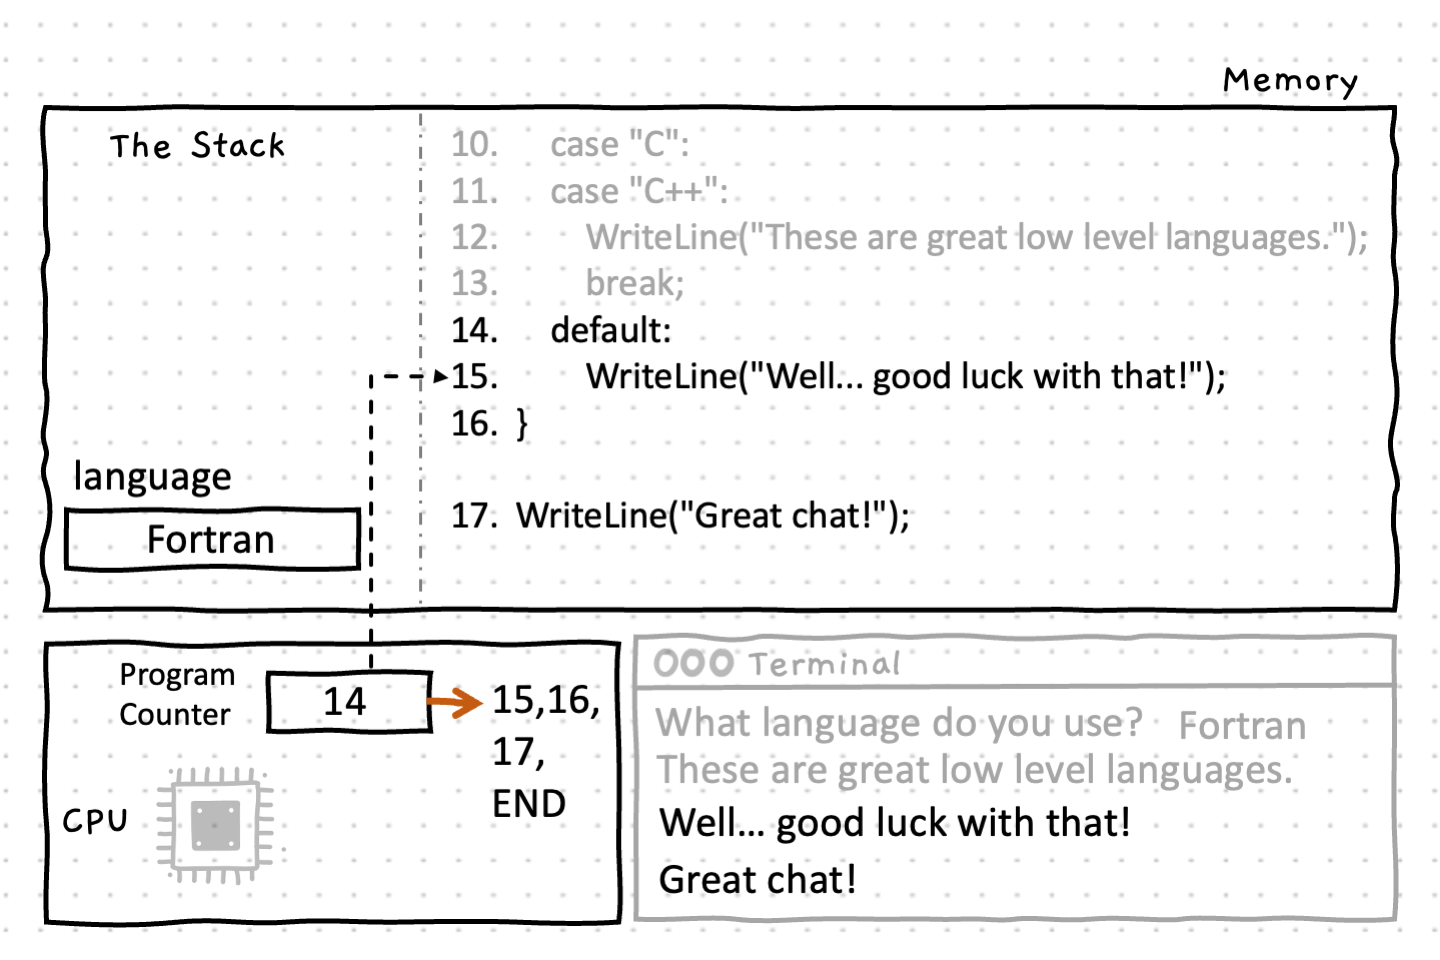
The final case is labelled with the default keyword.
This optional branch contains code you want to execute if none of the other cases matched.
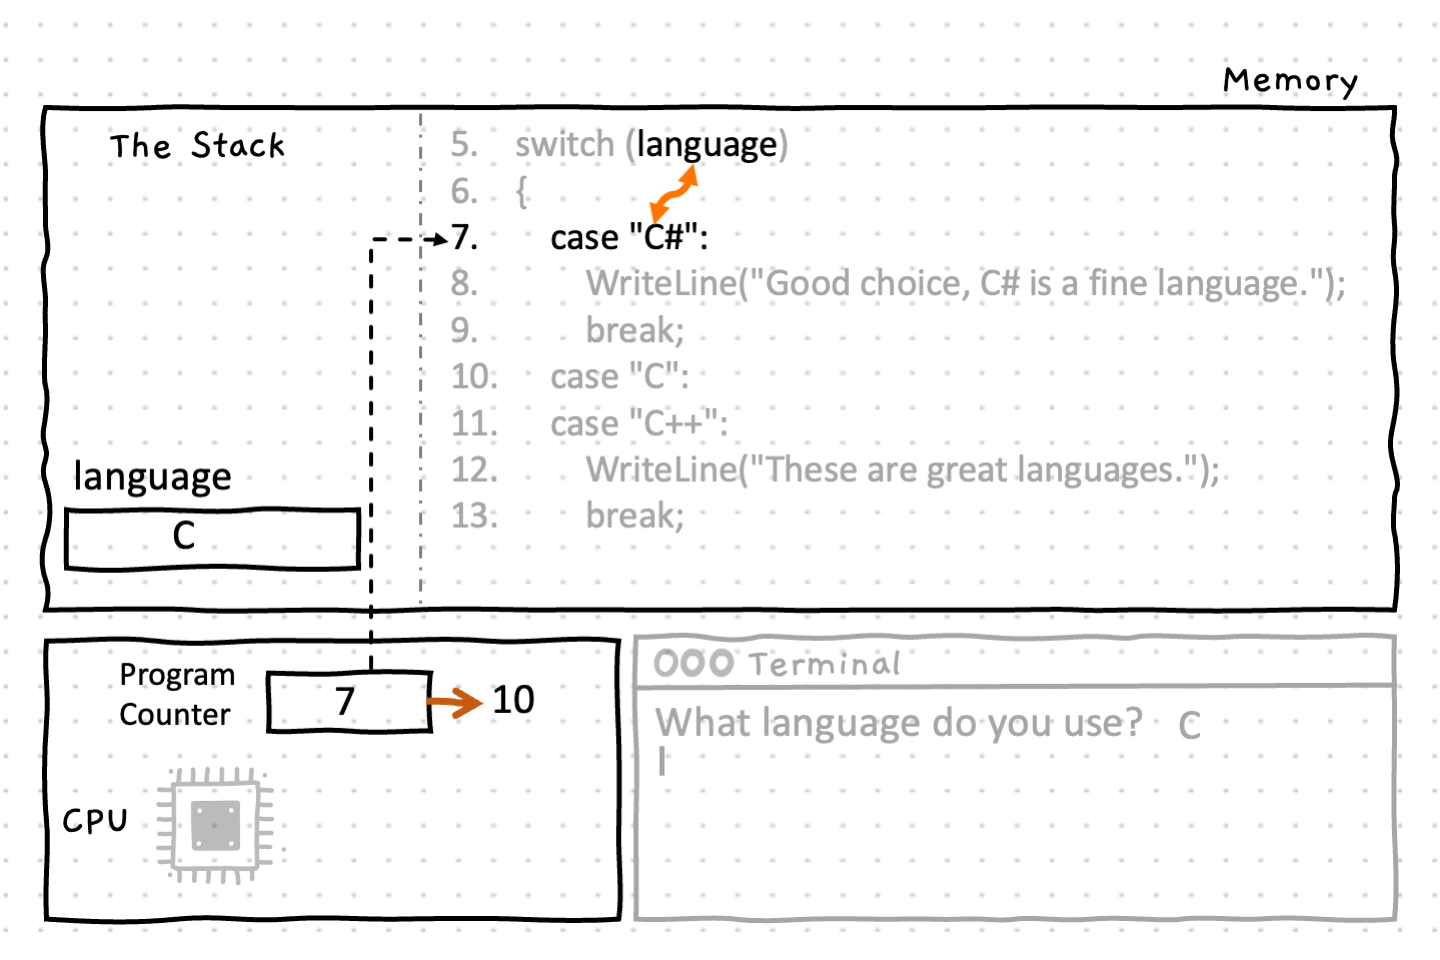
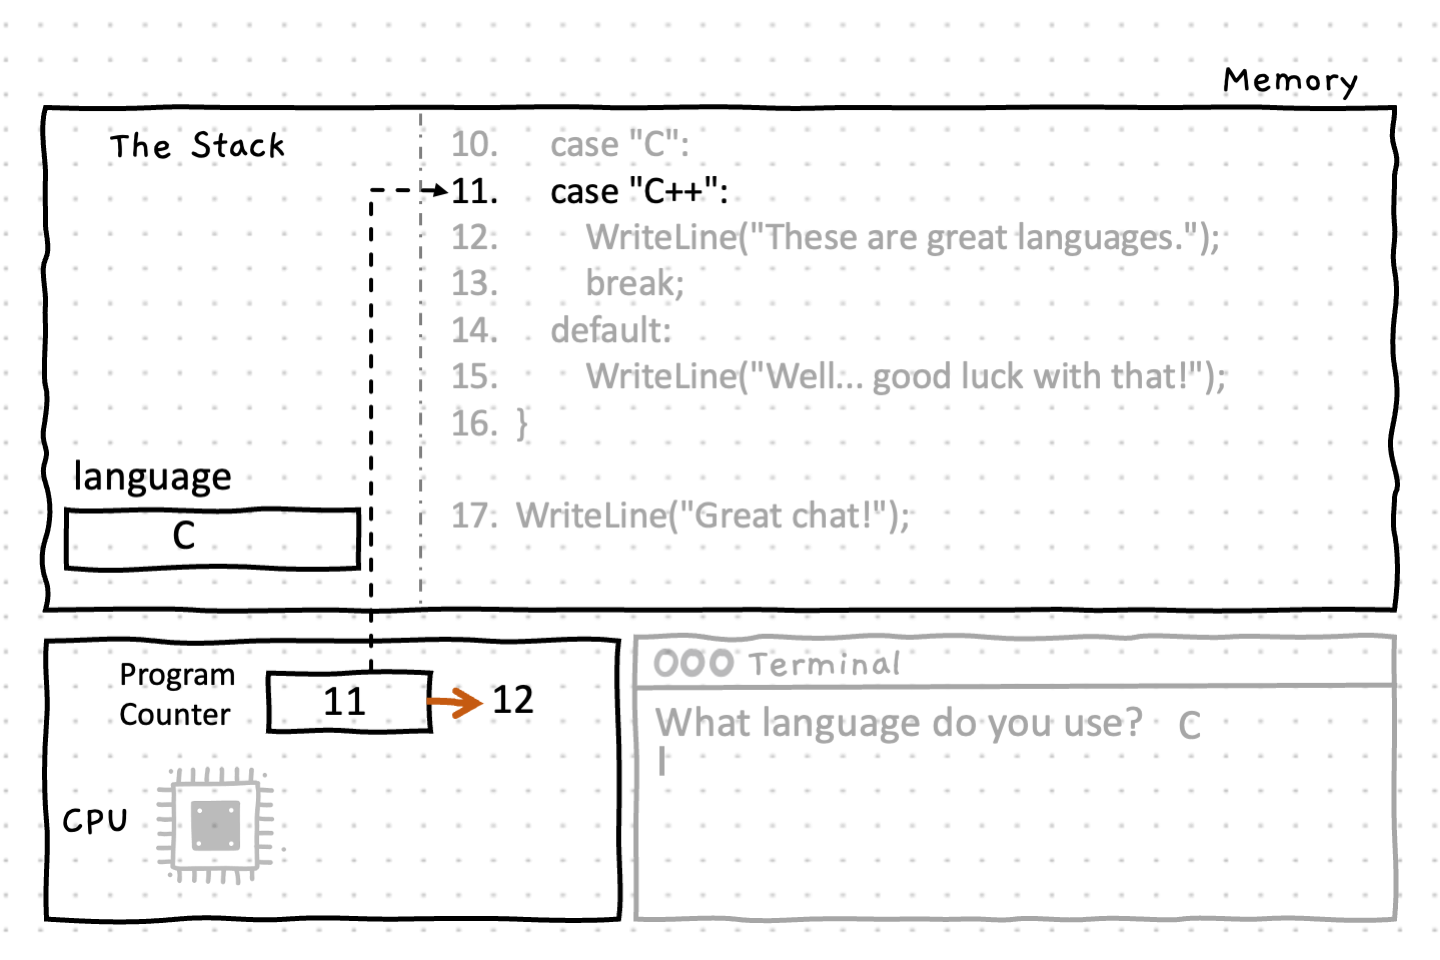
When a case is matched (i.e., the value of the expression matches the value of the case), the computer jumps to the first statement within that case and runs the code in sequence from that point.
This includes the code in the following cases!
You might be wondering why — surely when the computer encounters the next case it will see that the values don’t match and not run that branch?
It might seem unintuitive, but once a case has been matched, the computer basically just ignores all other “case” tests in the same case statement.
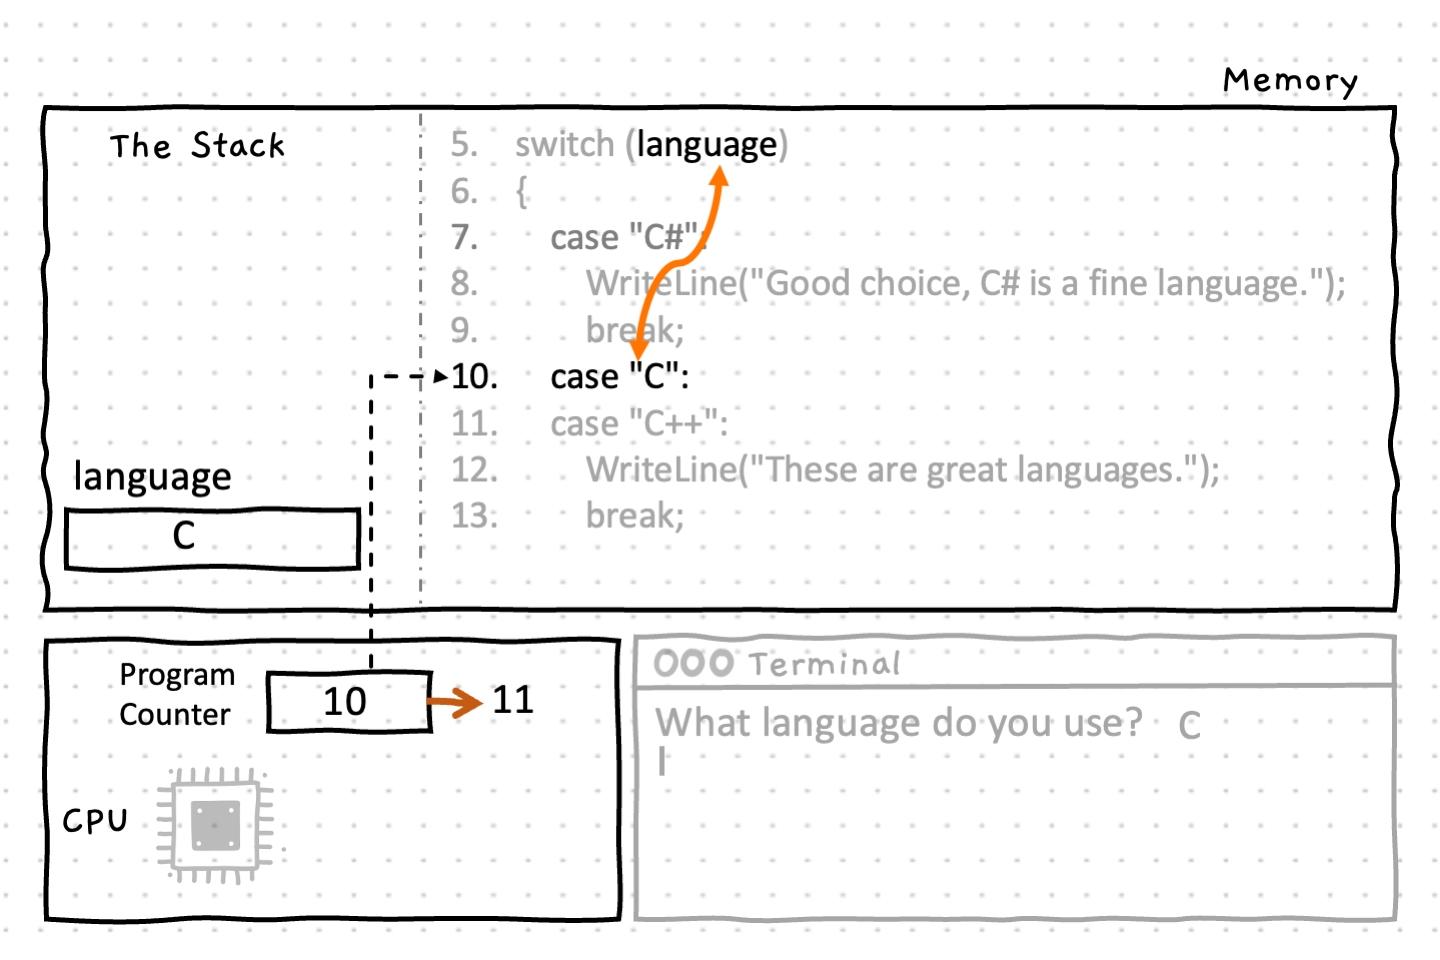
This allows the computer to “drop through” into other cases, which can be used to combine multiple branches.
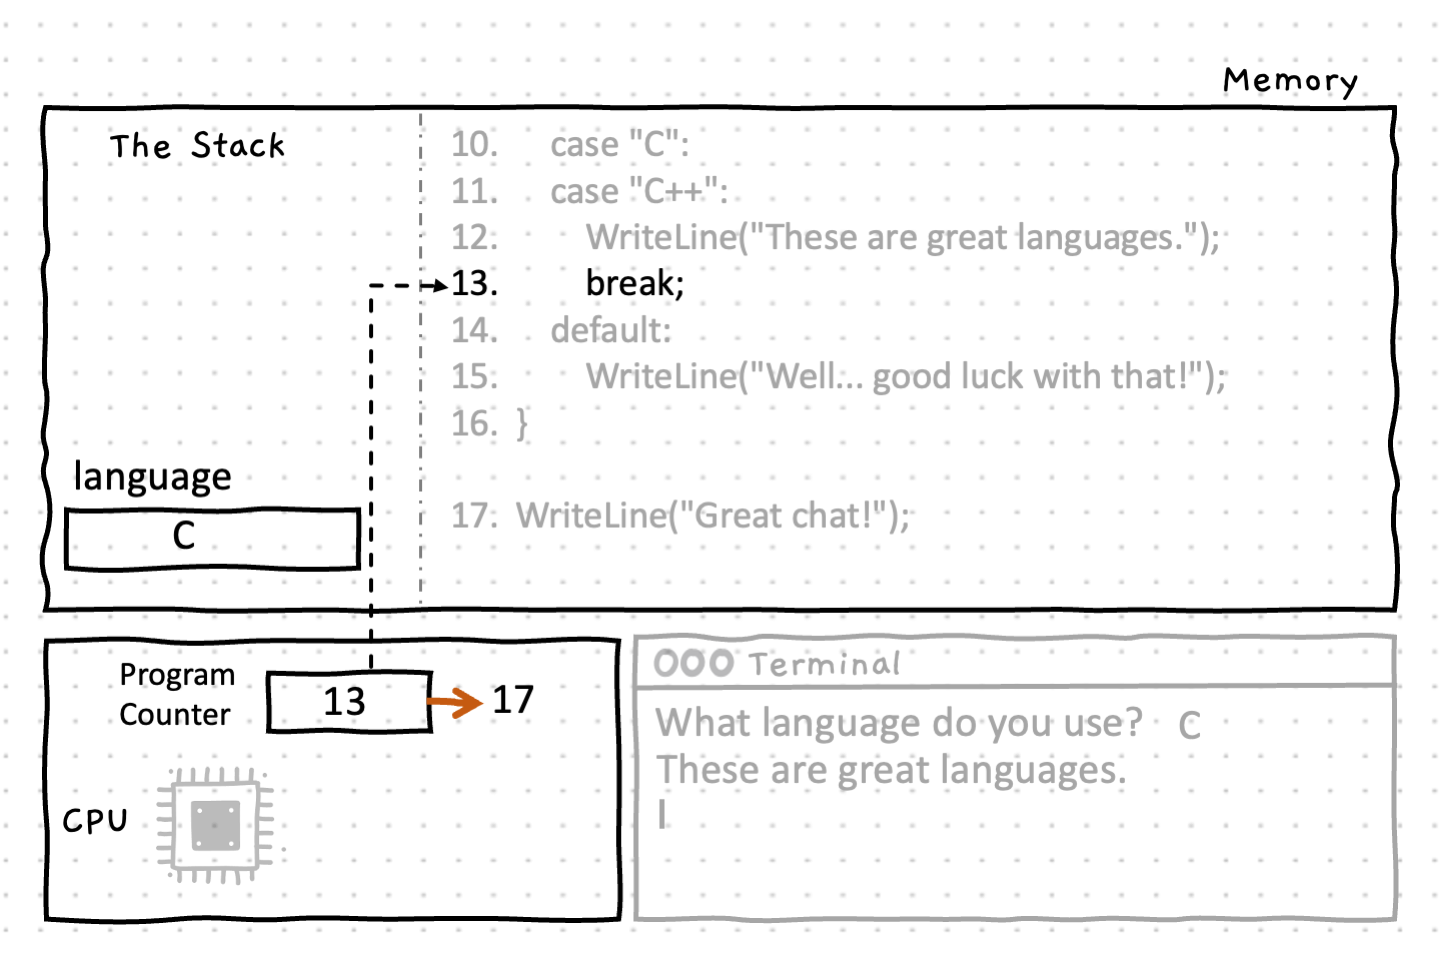
If you want the computer to skip to the end of a case statement, you must use the break statement. Break is used to jump to the end of the case statement, ensuring that you skip over paths you do not want to run. We will explore the break statement in more detail soon, but for now you just need to know that it will tell the computer to jump to the end of a case statement, and without it the code from the following cases will be executed.
How does case work?
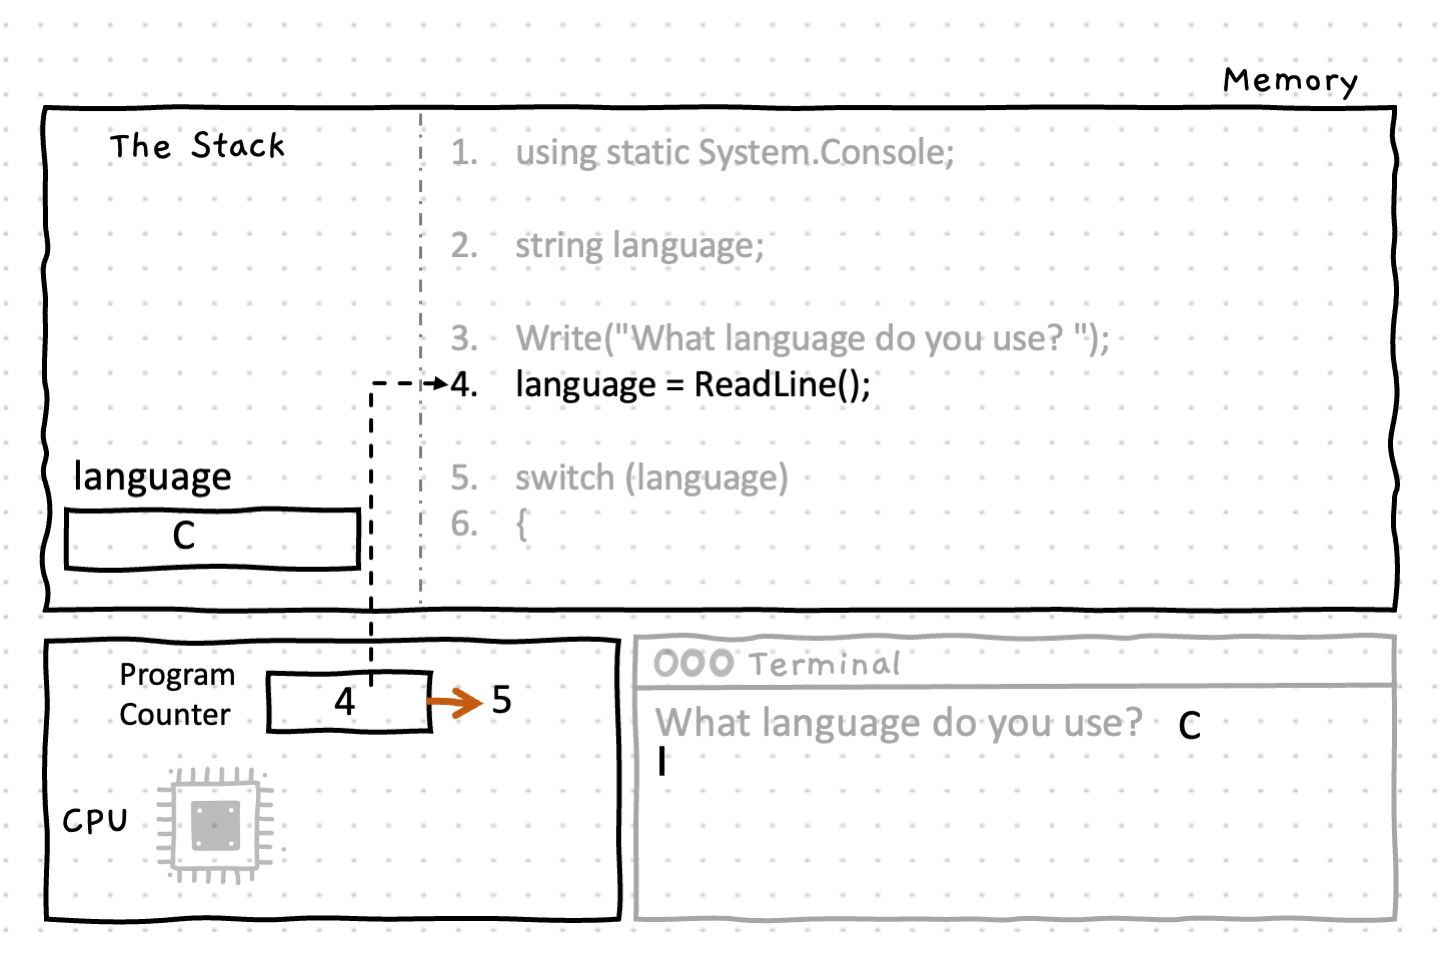
The case statement works in a very similar way to the if statement we worked through previously. The following code will achieve the same output as the last example from the if statement page.
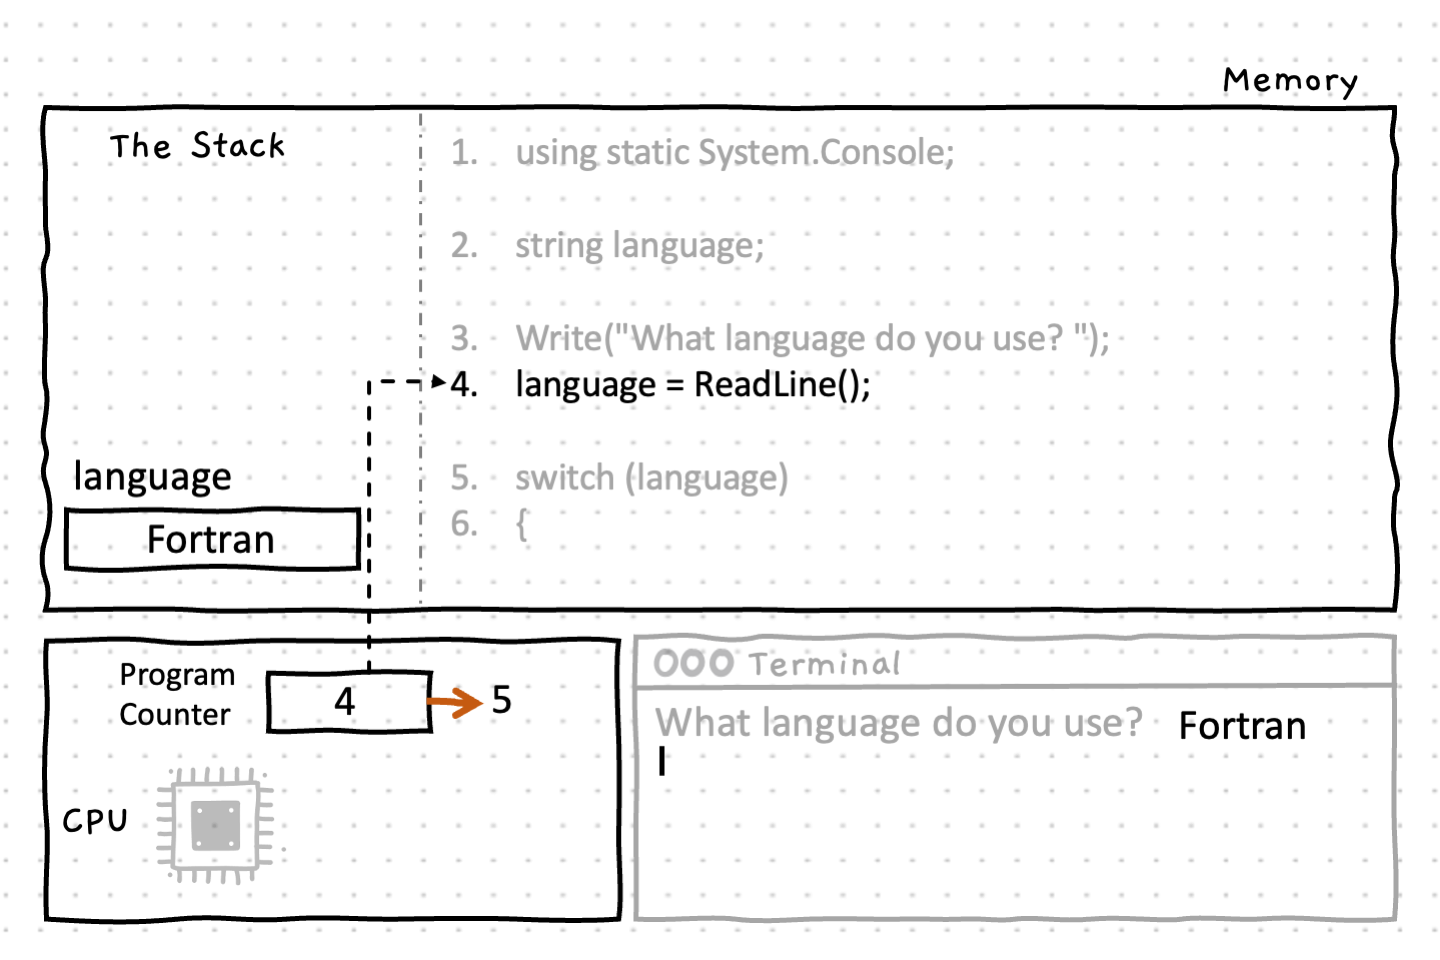
In this example, the value we want to check is whatever the user entered, which has been stored in the language variable.
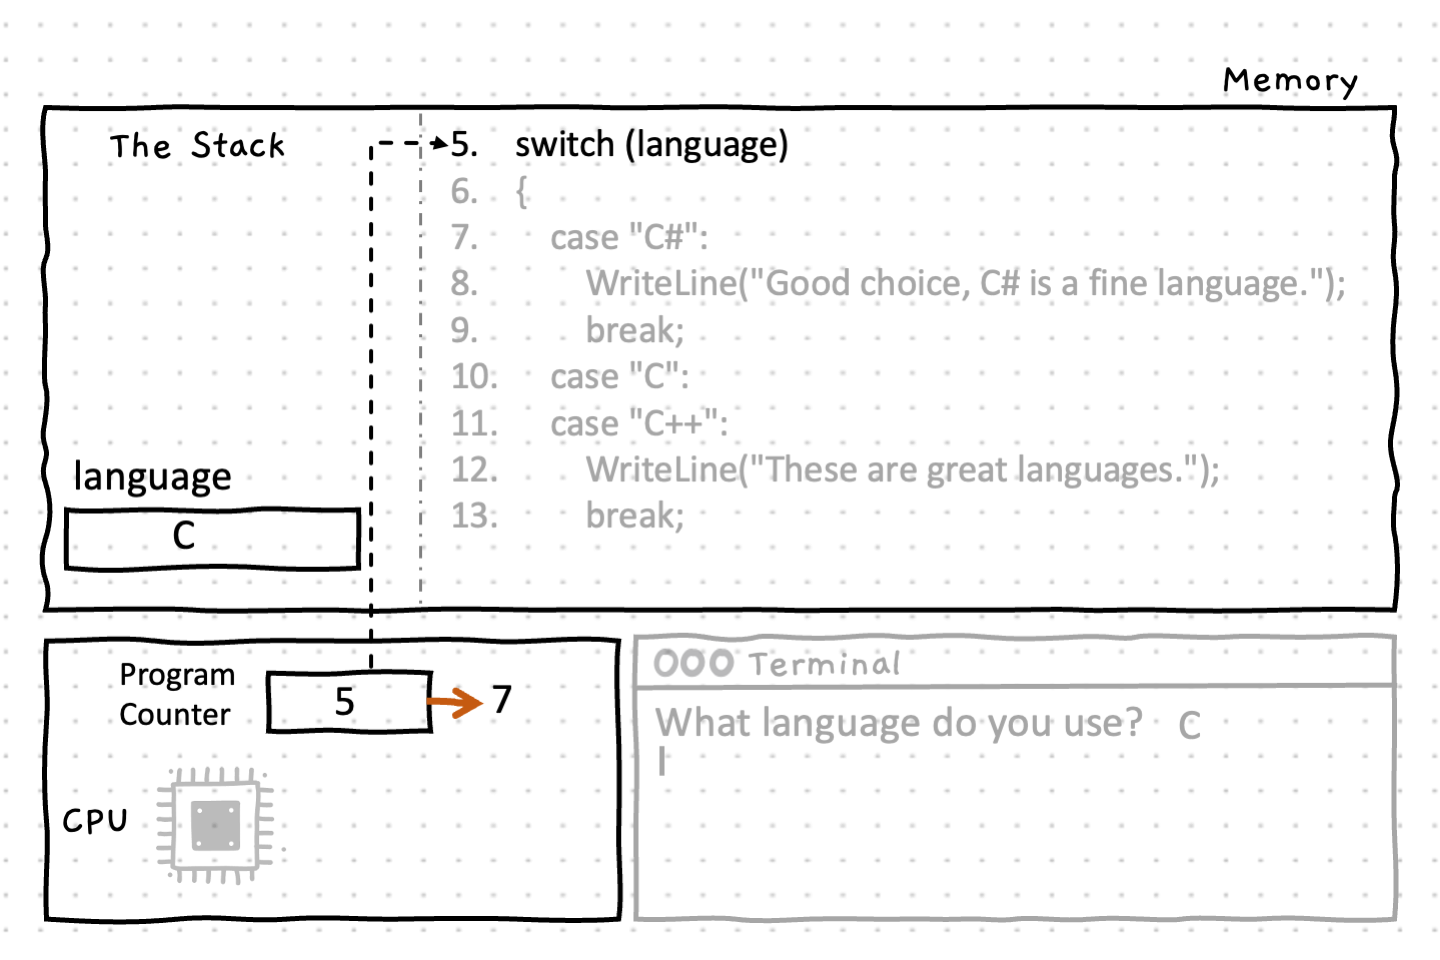
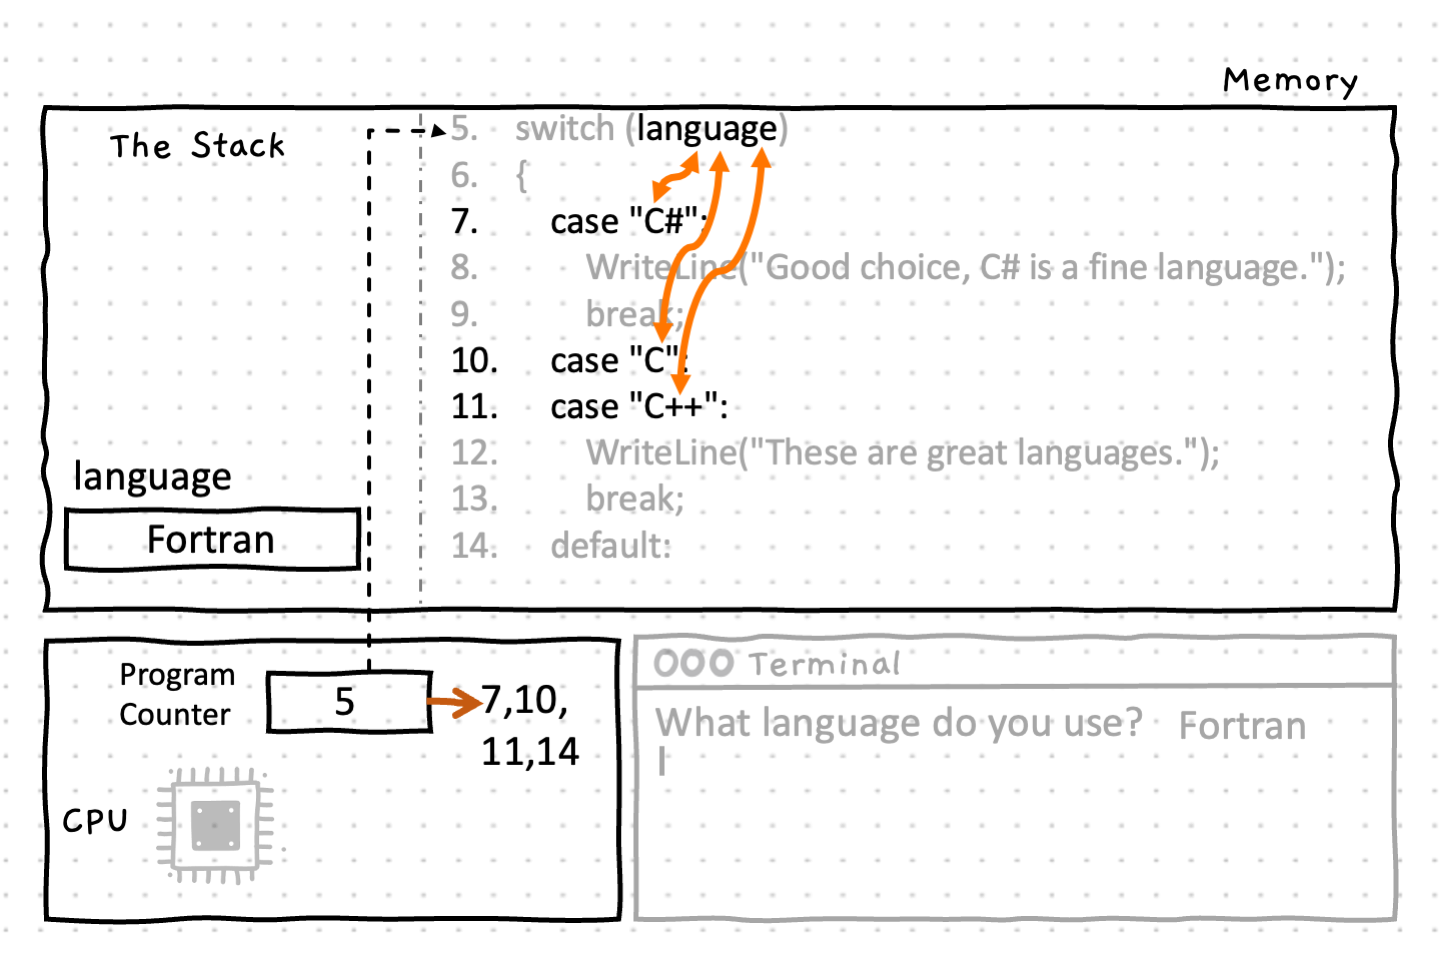
So, language goes in parentheses right after the switch keyword.
Within the body of the case statement you then have the separate cases you want to match.
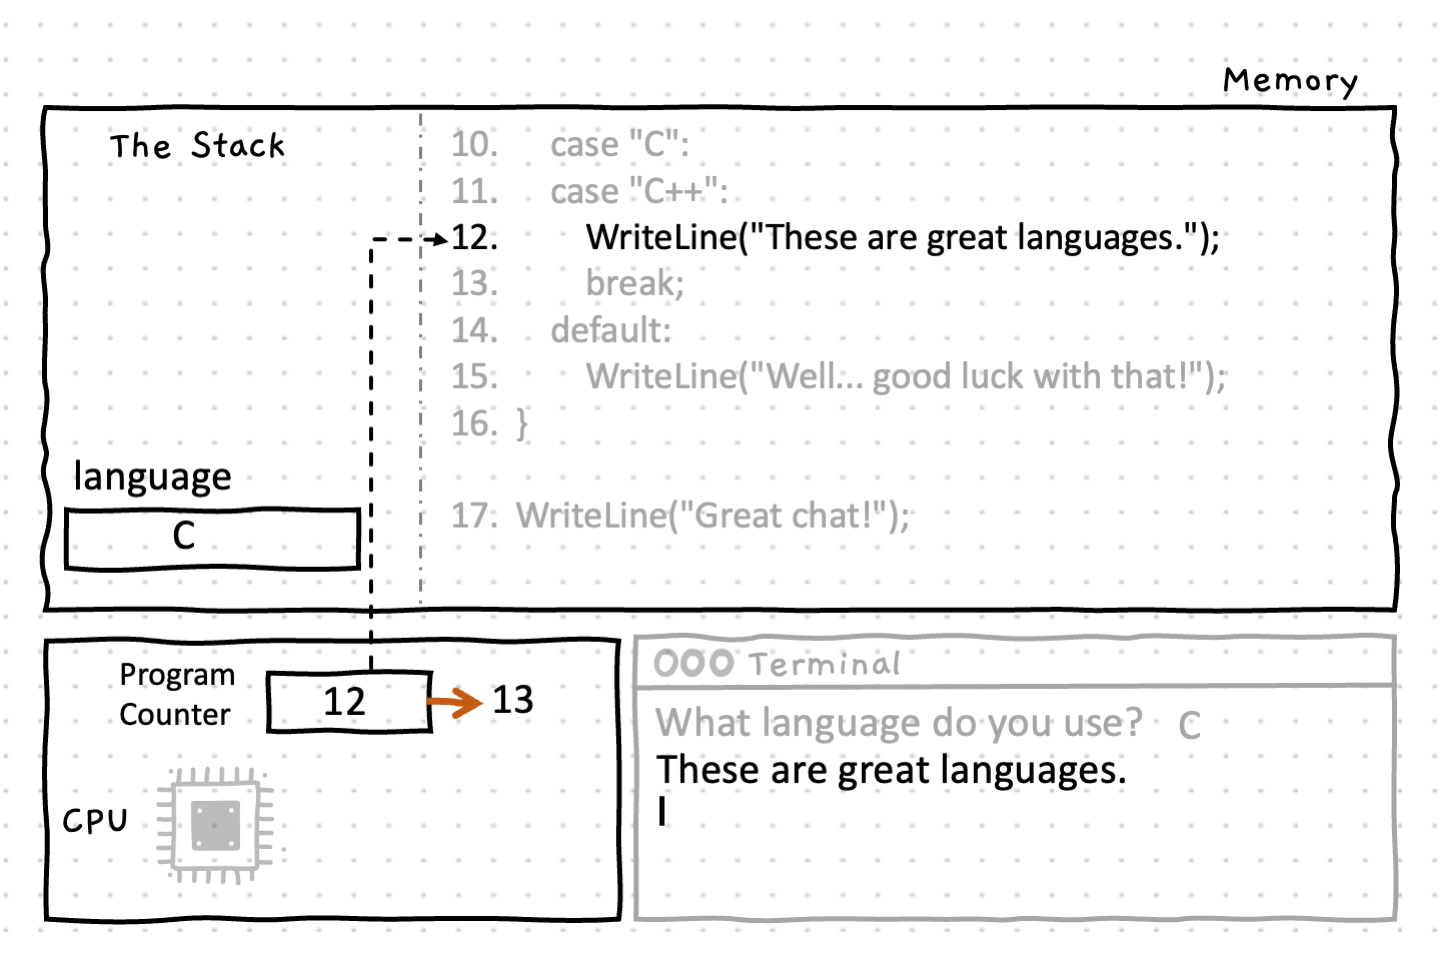
Notice that we have used the break statement at the end of the “C#” and “C++” branches to indicate the end of the instructions for these individual cases. Also notice how we intentionally do not use a break statement in the “C” case. This means that when the “C” path is matched, the control will flow through into the same set of statements that exist for the “C++” branch, and we have avoided needing to repeat the same code in both branches.
using static System.Console;
string language;
Write("What language do you use? ");language = ReadLine();
switch (language){ case "C#": WriteLine("Good choice, C# is a fine language."); break; case "C": case "C++": WriteLine("These are great languages."); break; default: WriteLine("Well... good luck with that!"); break;}
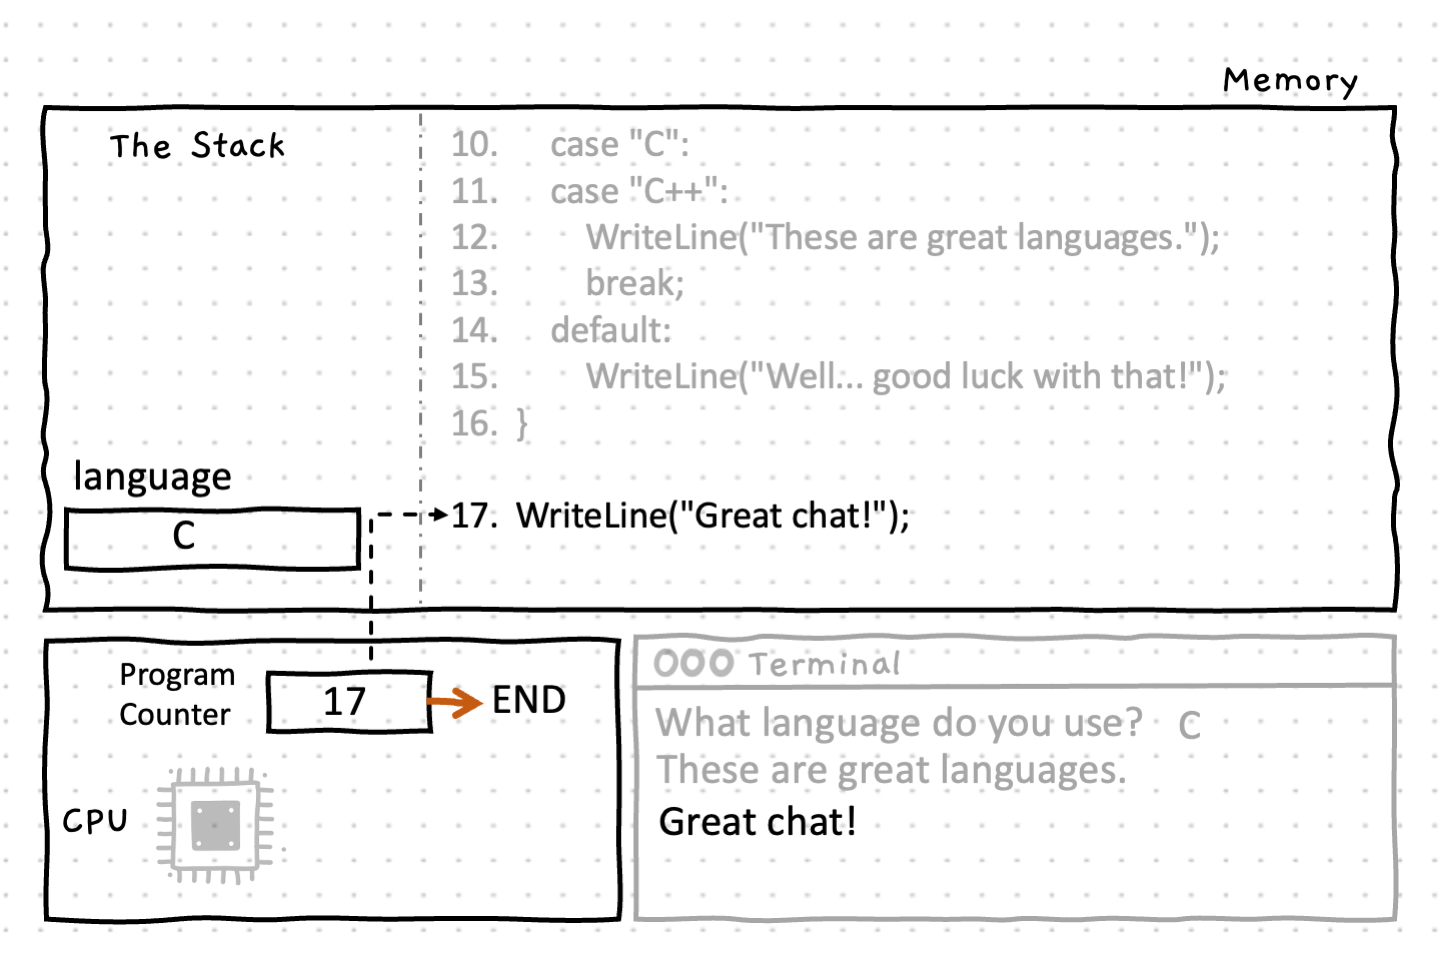
WriteLine("Great chat!");Use the following images to see how this code runs.